Photoshop Tutorial - Digital Compositing & Enhancing
Share this tutorial:
Turning an ordinary digital photo into something vibrant and fanciful may be easier than you think. If you don't have any photos of your own, DeviantArt provides a great place to find free stock photos to use. We'll be using a great scene from Chonastock.
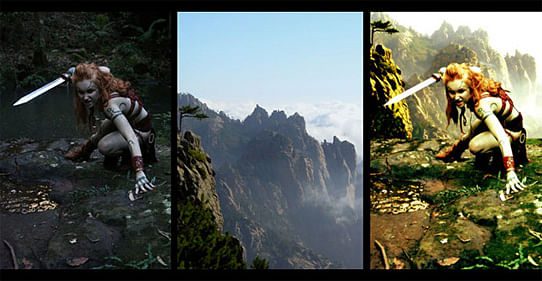
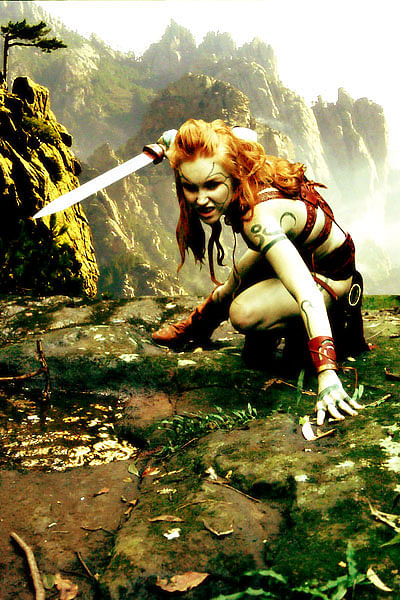
Here we have a costumed model posed in a dark, rocky setting. Lets see how we can improve on it, with some quick adjustments in photoshop, to create a movie-poster-like picture.
While the background is nice, lets change it to something more epic. This mountain scene by beefstock should work good.
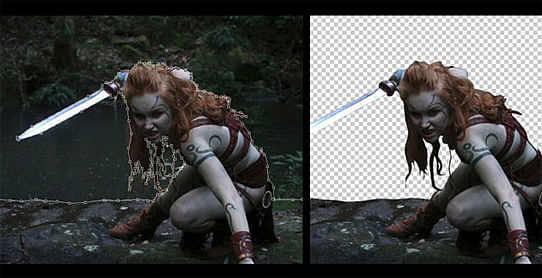
Use the pen tool to trace the background behind the model. Spend some time with the hair. Get between the strands and adjust your paths as you move along, this will be the most time-consuming part. Once you have it where you want, right click and "Make Selection."
Make sure this layer is not set as the Background. Double click on the layer in the Layers Palette and click OK on the dialog box that appears. Now you can press the backspace key to delete your selection, leaving a checkered background.
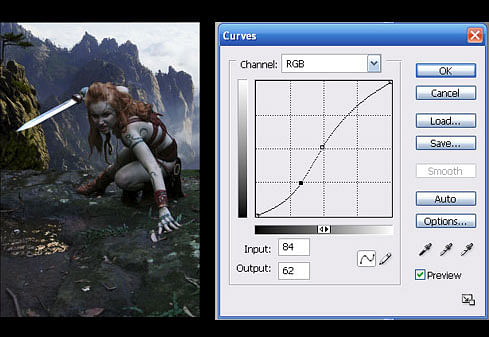
Now insert your mountain scene under the current layer.
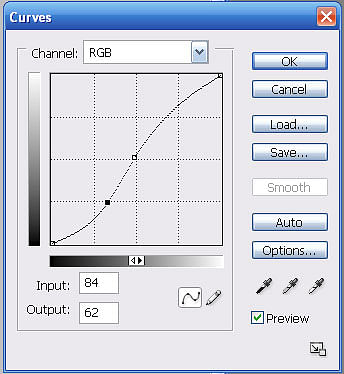
Adjust the curves slightly to make it match your foreground a little better.
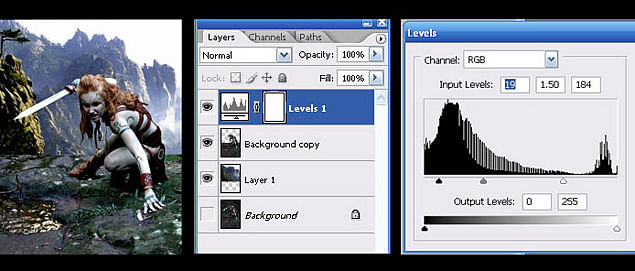
On the bottom of your Layers Palette, click on "Create New Fill or Adjustment Layer" and select "Levels." Here we can do an overall adjustment of the scene.
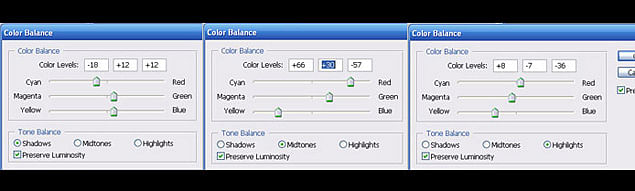
Make another adjustment layer, but this time select "Color Balance." Be creative here, spend some time to mess around with the shadows, midtones, and highlights. This is where you can create the mood. Try not to over do it -- over-saturating the highlights will blow it out, making it a bit unpleasant.
Things are looking good. At this point lets save a new PSD. We'll be flattening our current image, so its good to have a backup incase you want to go back to change or add to the layers. So go ahead and flatten the new PSD. Now lets add a soft ambiance to the scene.
Click and drag your layer to the icon on the bottom of the Layers Palette that says "Create New Layer". Do a mild Gaussian Blur on this new layer. Duplicate this blurred layer as well. Change one of these blurred layers to "Soft Light" and the other to "Screen".
Set each of these layer's opacities to about 50%. As you can see we've created a nice bloomy glow.

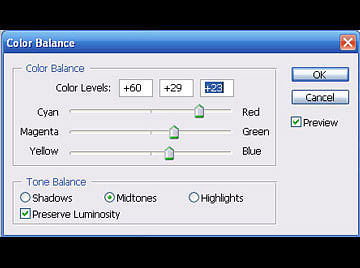
If you still think there's room for improvement, feel free to adjust the colors once more.
The last step will be to sharpen up image a bit. We don't want to sharpen everything, so we'll only be enhancing the edges. Flatten your composition again (save it once more if you'd like) and press Ctrl + A. Copy this layer (Ctrl + C).
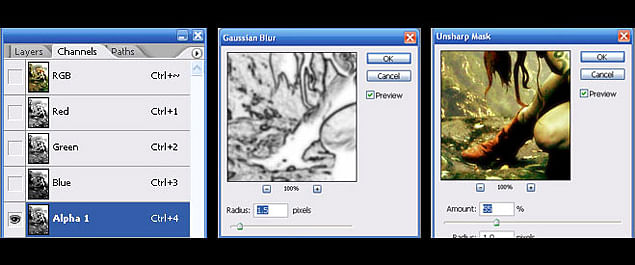
Now go to the Channels Palette and click "Create New Channel" at the bottom. Paste your image (Ctrl + V) into this new alpha layer. Apply "Find Edges" found in the Stylize filters, and gaussian blur the layer slightly.
Ctrl + Click on the Alpha 1 channel -- this will select all of the white areas of the channel -- what we want are the black areas (the edges) so we need to invert this selection (Shift + Ctrl + I). Go back to the Layers Palette and select your main layer. Now apply an Unsharp mask with the amount set at 55.
And that should do it. Apply this method to your own photos and have fun.
Enjoy this tutorial?
Share it with others who might find it useful!