Photoshop Tutorial - Compositing with Adjustment Layers
Share this tutorial:
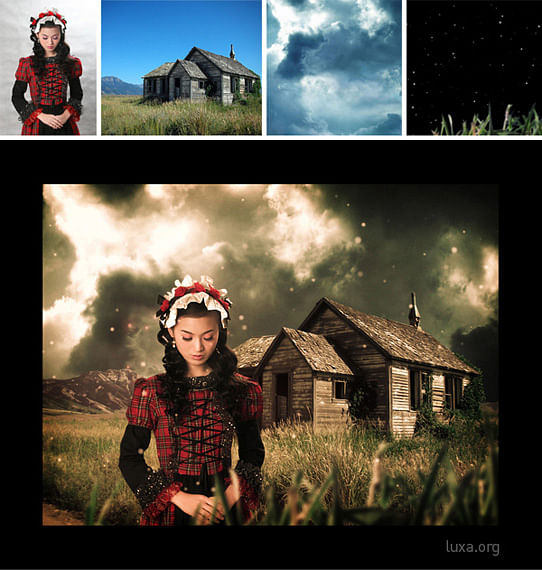
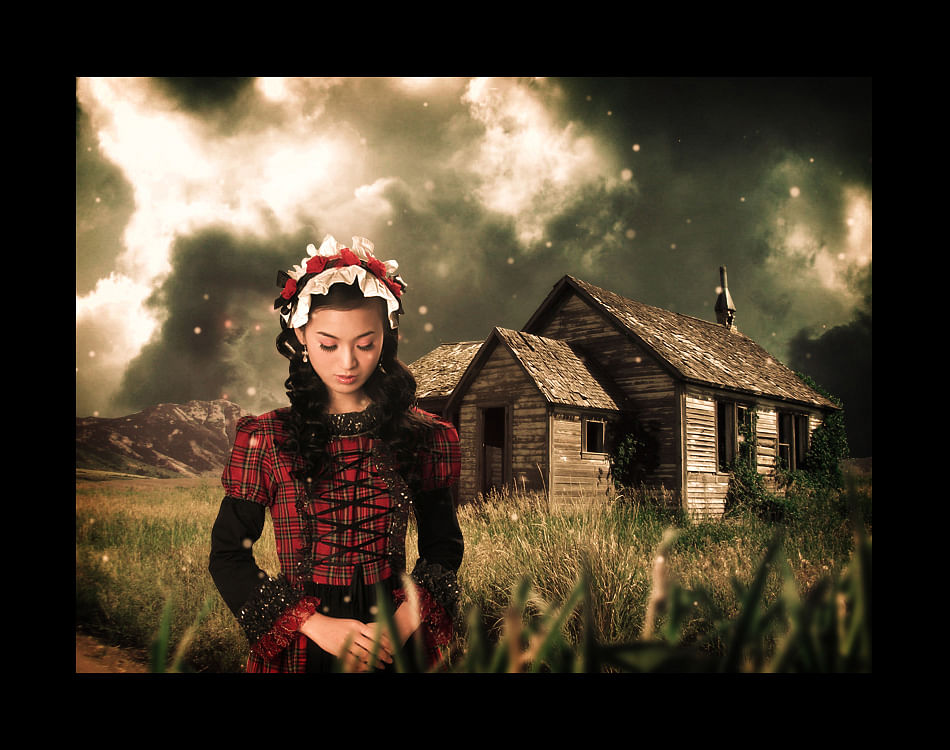
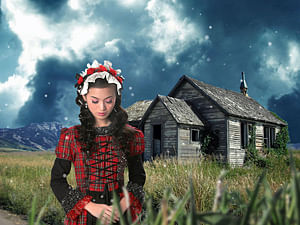
Compositing with Photoshop is one part technique and two parts imagination. In the example below, I've created a dark and mysterious scene with a young girl paused in an eerily calm storm. Here's how I made it:
As you can see, the final result is a compilation of several layers blended together with thematic color correcting. Adjusting the mood of the scene by tweaking the color balance through the use of adjustment layers brings the image together as a cohesive story. Simply sandwiching layers on one another won't produce the same effect and fail at convincing your audience. It all starts with an idea. In this case: a theme of ominous beauty.
Your first order of business would be to scour the stock archives for imagery you have in mind, while in the process, almost certainly developing on your idea with what becomes available. For this tutorial, follow along with the examples I've provided to get an idea of how it all comes together.
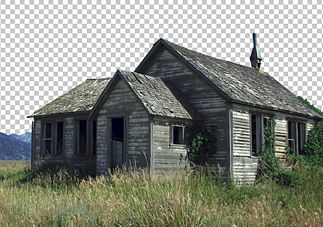
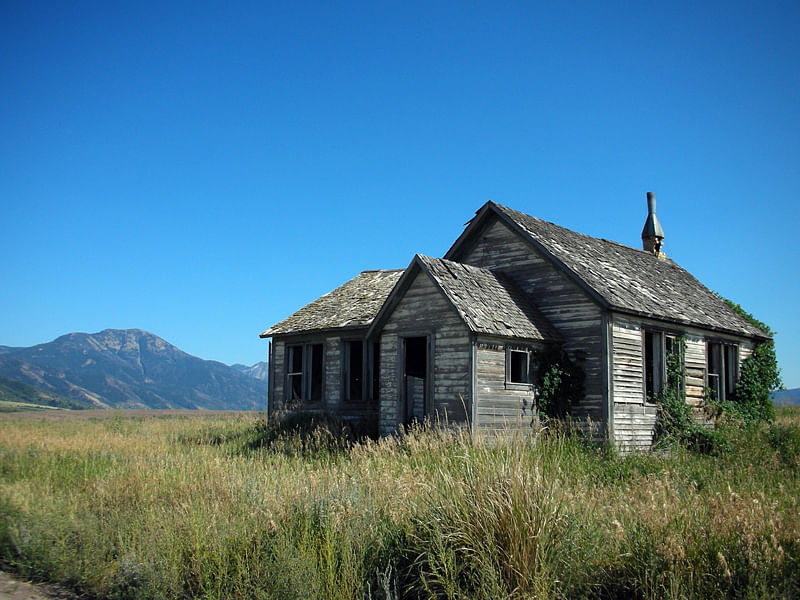
We'll start out with this old house resting in a pleasant country setting. The sky isn't as nearly as menacing as it should be, so we can get rid of that with the weapon of your choice, preferably the Pen Tool. Take your time and cut those pixels out with precision. Even the smallest imperfections will stand out. Though for the sake of this tutorial, feel free to skip ahead with the PSDs provided.
Our background is now ready for a sky -- something you won't have trouble finding. Drop in your clouds and position them as desired. The clouds you choose are a large part of establishing the atmosphere.
Download clouds.jpg
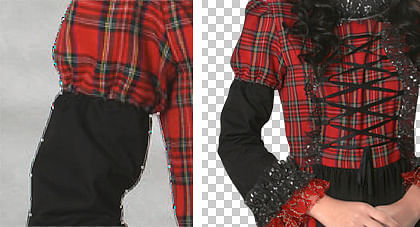
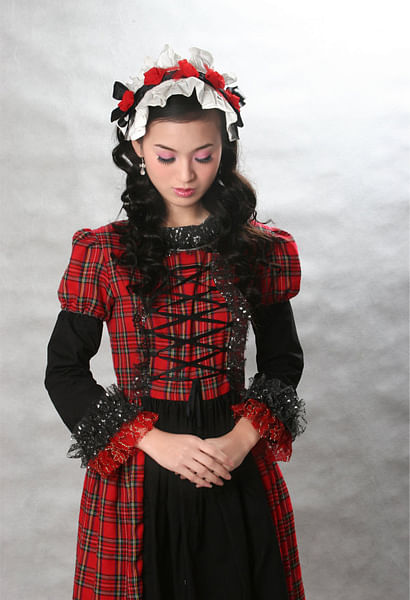
Our subject comes from a talented photographer in DeviantArt's stock photography section, angelcurioso. Again, we'll need to spend some time with the Pen tool, carefully clipping her out of the backdrop. When all looks well, place her above the background layers.
Next we'll add in a few details to add more depth to our composition: Grass for the foreground and a light snow. Grass or foliage can be easily found, but excruciating to extract. Once you've accomplished it however, you'll have it to reuse for future projects. The snow is actually a frame from an After Effects project of mine, produced by a particle plugin. But this can be replicated with a brush tool and varying opacities.
Place these layers on top of your subject. Add a gaussian blur (~2.5) to the grass to fake a depth-of-field effect. Now you have a fitting foreground element that doesn't stand out too much. Since the snow is against a black background, change the blending mode of this layer to Screen.
Your montage of layers is in place. It's time for the fun part: color correcting. We'll be using adjustment layers to fix the overall levels and balance of colors.
Create a new Adjustment Layer from the bottom of the layers pallette

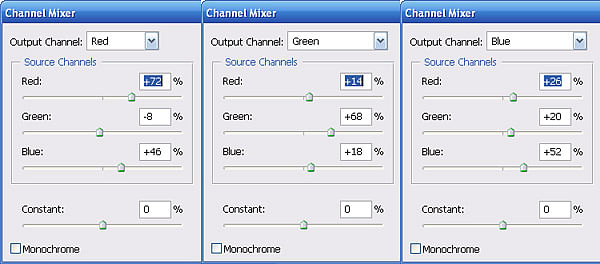
Start by adding a Channel Mixer adjustment layer. This step is done by eye. Was I did here was flatten out the overall colors by playing with the individual channels. The result should leave you with a less saturated image, ready to colorize.
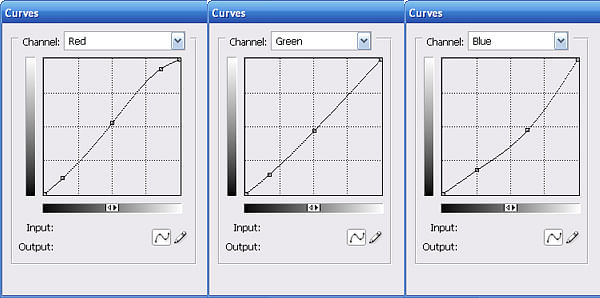
Finally, we'll be using a Curves adjustment layer to set the mood. Once again this step relies on lots of toying, nudging the reds, greens, and blues until you get the effect you're looking for. As you can see below, I've primarily taken out some blue and added more red for a warm ambience with crushed blacks. These settings are entirely up to you, and vary based on the photos you're using. You can download the settings I used in the Photoshop file below.
Since these color adjustments are on layers of their own, you're free to go back and experimented with your composition. For a finishing touch, adding a slight vignette will frame everything nicely.
Enjoy this tutorial?
Share it with others who might find it useful!